3D Projection
3D projection systems create a sense of depth and volume by displaying slightly different images to each eye, which are then combined by the brain to form a 3D image. There are two main types of 3D projection: Active 3D, which uses active shutter glasses that rapidly switch between left and right eye views, and Passive 3D, common in cinemas, which uses polarized glasses and specialized screens to send the correct image to each eye.
Active 3D: A single projector displays alternating frames for the left and right eyes at a high frame rate (e.g., 120Hz for both eyes combined), which is synchronized with active shutter glasses. The glasses rapidly open and close shutters for each eye to block the image not meant for that eye.
Passive 3D: This often uses two projectors, each with polarizing filters and/or modulators, to project the left and right eye images simultaneously and separately onto, in the case of polarizing filters a special silver screen, or for colour bandpass filtering, a plain white screen. Glasses which match the passive method in use, then filter the light to ensure each eye receives only its intended image.
3D Projection Methods
| Method | Description |
|---|---|
| Anaglyph 3D Projection | Anaglyph 3D Projection offers an affordable and compatible method for viewing 3D content, requiring only low-cost red-and-cyan glasses and a single projector. However, this technique comes with significant limitations, including poor colour accuracy, visible ghosting, and potential eye strain or discomfort due to retinal rivalry. While simpler and more accessible than other 3D technologies like shutter glasses, it compromises overall image quality for a less immersive experience. |
| Active Shutter 3D Projection | Active Shutter 3D Projection has common positives including excellent 3D effect, high refresh rates, and comfortable wear for some, but drawbacks like potential flicker, eye strain, and inconsistent performance. Compatibility with specific TV brands and projectors is a key concern, as are the durability and build quality of different models. While some models offer advanced features like universal compatibility and rechargeable batteries, user experiences vary significantly based on product quality and specific usage scenarios. |
| Passive 3D Projection | Passive 3D Projection uses light with a different orientation for the projected light associated with the right versus left images. The passive glasses worn by the viewers then have lenses that have filters where each lens' orientation matches the orientation of the light emitted each projector in combination with a filter or modulator. |
| Linear Polarized Passive 3D Projection | Linear Polarized Passive 3D Projection uses linear polarizing filters on the projector(s) as well as with the 3D glasses. The orientation of the polarization for one image stream (e.g., right images) is rotated 90 degrees from the other image stream (e.g., left images). The most common orientations used for passive 3D projection are to either have one filter oriented for vertical polarization and the second filter oriented for horizontal polarization, or to have one filter oriented +45 degrees from vertical and the other filter oriented –45 degrees. This latter orientation is used by the IMAX passive 3D projection system. |
| Circular Polarized Passive 3D Projection | Circular Polarized Passive 3D Projection uses circular polarizing filters on the projector(s) as well as with the 3D glasses. In this case one image stream is right-hand circular polarized while the other image stream is left-hand circular polarized. With either polarization approach the polarizing filter used for a given lens on the glasses will only pass light having the same orientation of that filter and will block the light having the opposite polarization. In practice some amount of the light intended of the one eye is leaked through to the other and when this occurs the result is 3D crosstalk/ghosting. |
| Colour Bandpass Filtering Passive 3D Projection | Colour Bandpass Filtering Passive 3D Projection takes advantage of colour spectrum of the projected light. Full colour projected images are created by projecting the red, green and blue (RGB) components of the image. The full spectrum of visible colours can be created by combining these three primary colours (i.e., RGB) in different proportions. Certain passive 3D projection systems separate the right from left images by using narrow bandpass optical interference filters incorporating a small offset to the exact wavelength (or frequency) used for the right image's primary colours versus the left image's primary colours. This technique is sometimes called "wavelength multiplexing". The viewer’s 3D glasses then must have lenses using complementary narrow bandpass interference filters. The leading developer of this technology is the German company Infitec GmbH and the Infitec system is used by Dolby Laboratories for their passive “Dolby 3D” projection system that is used in some commercial cinemas |
For polarization based passive 3D systems to work correctly, the projection screen must retain the polarization of the light being emitted from the projector. Any loss of the polarization will result in 3D crosstalk/ghosting. In general, special screen materials must be used and these screens typically have a silver-coloured reflective surface.
Projector Screens
| Topic | Discussion |
|---|---|
| Projector Screen vs a Wall | To increase portability and decrease the immediate cost, some customers opt to project their image onto a wall or white sheet, instead of purchasing a projector screen. To get the best performance out of your projector, it is recommended to use a good quality projector screen. Some projectors come with settings to alter their output to compensate for the wall colour (e.g. blackboard, light yellow, light blue, pink or grey). |
| Front vs Rear Projection | Front Projection material is the most sold screen material making up over 95% of projector screen sales at Just Projectors. Front projection material is opaque, meaning that the projected light is reflected backward to the viewer/projector. The viewers would be watching the screen from the same side of the screen as where the projector is located. Front projection screens are available in a range of types including wall mount, ceiling mount, and self-standing/portable. Rear Projection is incompatible with screens that have a silver-coloured reflective surface required for use with polarised 3D projection. |
| Short Throw vs Long Throw | Short-throw projectors create a large image from a short distance, making them ideal for smaller rooms and avoiding obstacles, while long-throw projectors need a greater distance to project an image and are better for larger spaces where image quality is a priority and there's more flexibility in placement. The primary difference is their throw ratio, which dictates how far away the projector must be from the screen to achieve a specific image size. Image distortion in the corners may be more noticeable with short-throw models than with long-throw models. Short-throw projectors are more difficult to use with additional filters and/or modulators required for passive 3D projection methods. |
| Fixed Frame vs Roller Projector Screens (Manual Pull down & motorised) | A fixed projector screen offers superior image quality by providing a permanently tensioned, flat surface, making it ideal for dedicated home theatres, but it is a permanent fixture and more costly. A pull-down projector screen (manual or electric) is more versatile, budget-friendly, and convenient as it can be rolled away when not in use, but it may experience surface distortions like wrinkles or "curl-in" over time, though tab-tensioning can improve flatness. A motorised, rolldown, tensioned screen offers the best balance of versatility, convenience and image quality. |
| Tensioned vs Non-tensioned Screens | Tensioned screens offer superior contrast and colour accuracy compared to their non-tensioned counterparts. With a perfectly flat surface, the light is evenly reflected, resulting in more accurate colour reproduction and better black levels. |
| Self Standing / Portable Projector Screens | Portable projector screens offer superior convenience and portability for temporary or flexible setups, allowing users to move them easily and store them compactly, but they can compromise image quality with potential wrinkles and less durability. Normal (fixed or wall-mounted) screens provide superior image quality, a professional appearance, and better stability and durability, making them the ideal choice for permanent home cinemas or professional settings where maximum image performance is desired. |
| Aspect Ratio | A 16:9 ratio is the commonly used ratio for home projectors. Television broadcast, and streaming apps such as Netflix, use the 16:9 aspect ratio so it makes sense that a home theatre type of projector also features this aspect ratio. The FULL HD and 4K resolutions common to 3D exhibitions/competition are both 16:9 aspect ratio resolutions. |
| Screen Gain | Projector screen gain is a measurement of the screen's reflectivity compared to a standard white surface, indicating how much light it reflects back towards the audience. A gain of 1.0 is considered standard, reflecting the same amount of light as the reference surface. A higher gain (e.g., 1.5) results in a brighter image for viewers directly in front but can narrow the viewing angle and cause "hot-spotting". Lower gain screens (e.g., 0.8) produce a dimmer but more uniform image with a wider viewing angle, making them ideal for darkened rooms and larger audiences. Polarised 3D projection requires screens with a higher gain where the viewing distance and angle must be balanced against "hot-spotting". |
| High-Gain for Passive 3D | A high-gain projector screen is a screen that increases image brightness, which is essential for 3D viewing because the 3D glasses filter out a significant amount of light, making the image appear dimmer. These screens enhance brightness by directing light more towards the audience, but they also reduce the viewing angle and can cause issues like "hot-spotting" or inconsistent brightness. Materials like vinyl or acrylic are often used for these high-gain screens, which can also improve the 3D image's clarity and overall experience. |
For 3D projection using polarising filters, silver metallic screens with high gain (2.4+) and good extinction (>98%) properties are best.
Projector Screen Size
To choose the right projector screen size, consider your viewing distance, ensuring it is roughly 1.5 to 2.5 times the screen's width for comfort. Account for your room size and the audience size, as a larger space and more viewers require a larger screen for everyone to see clearly. Also, match the screen's aspect ratio (typically 16:9 for modern content) to your primary viewing material to avoid black bars. The Society of Motion Picture and Television Engineers in the USA recommend positioning yourself at a range where the image fills approximately 30 degrees of your field of vision.
| Step | Action | Explanation |
|---|---|---|
| Determine Your Viewing Distance | Measure | Measure the distance from your projector to the wall where the screen will be. Then, estimate the distance from the furthest seating position to that wall. |
| The 1.5-2.5 Rule | For a comfortable and immersive experience, your viewing distance should be approximately 1.5 to 2.5 times the width of the screen. This range allows for an optimal viewing experience, with 1.5 times being the minimum distance for a more immersive experience and 2.5 times being the maximum distance for maintaining image clarity. "The viewing distance is critical in determining the ideal screen size. Sitting too close or too far can significantly impact the viewing experience." | |
| Consider Your Room Size and Audience | Smaller Rooms | A smaller screen size will likely be more appropriate for a compact space to prevent the image from feeling overwhelming or losing quality. |
| Larger Rooms/Audiences | A larger room and/or a larger audience will necessitate a bigger screen so that everyone can view the content comfortably from their seats. | |
| Match the Aspect Ratio | 16:9 | This is the standard for most modern content, including HD movies, TV shows, and video games. |
| 2.35:1 | If your primary content is widescreen cinema (like IMAX or anamorphic movies), you might consider a wider 2.35:1 screen. | |
| Avoid Black Bars | An aspect ratio mismatch will result in black bars appearing on the screen. | |
| Check Your Projector's Capabilities | Throw Distance | Some projectors are "short-throw," meaning they can be placed closer to the screen, while others are "long-throw" and need more distance. |
| Image Quality | Projecting too large an image can reduce the picture's brightness and clarity. Ensure the screen size falls within the "recommended image size" specified in your projector's manual. | |
| Projector Screen Position | 0 to 15 degrees | Vertical placement of the screen should be taken into consideration. Seated audiences should be able to keep their eyes oriented at approximately mid-level with the screen and maintain a viewing angle of 15 degrees or less. With a ceiling mounted screen this requires the screen to have an adequately long top black border to allow the screen to lower down into the best position. |
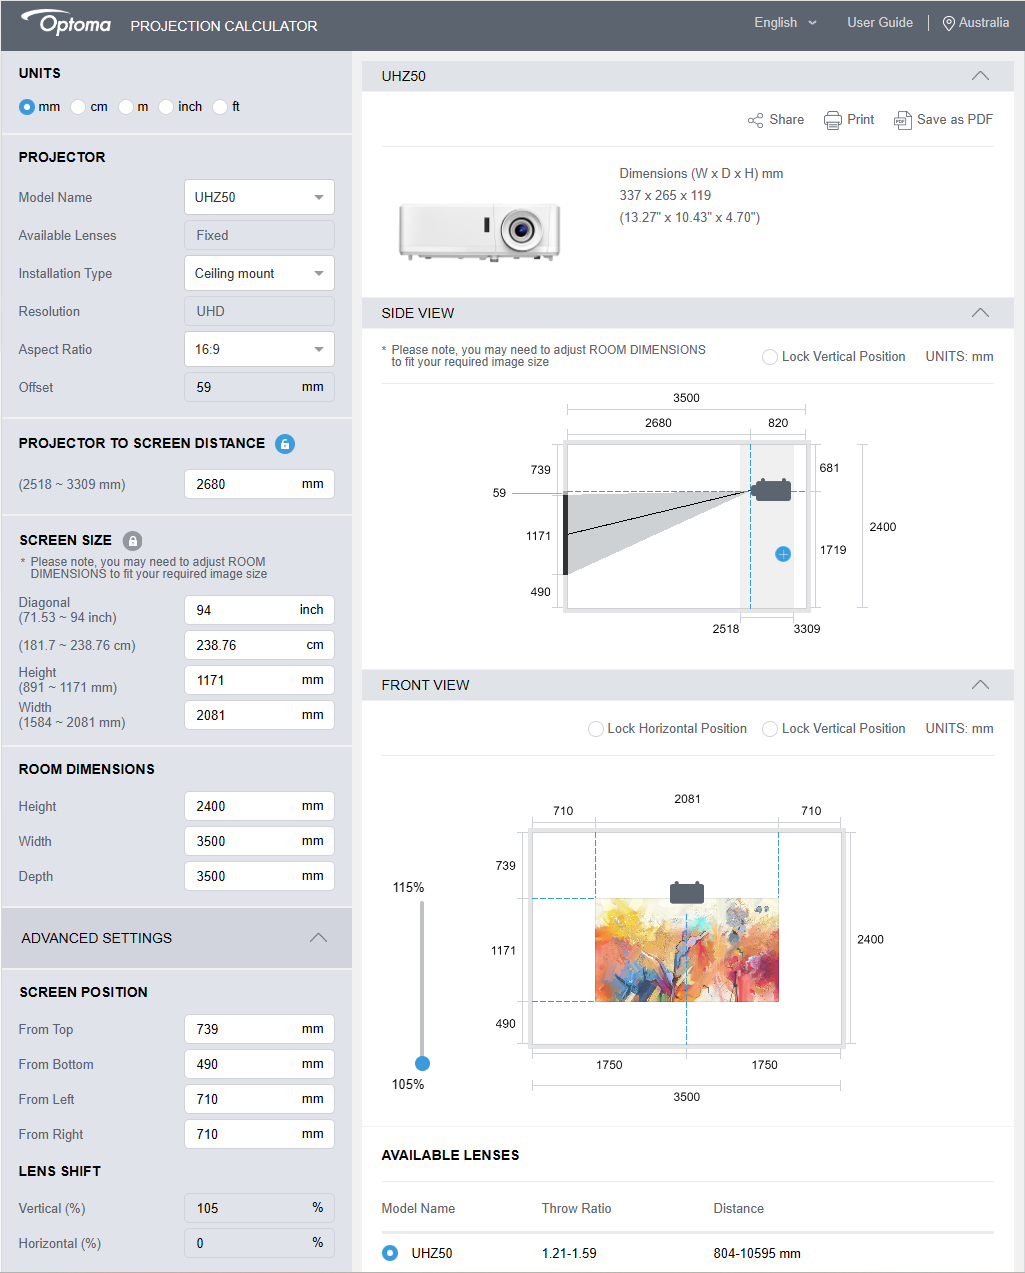
Optoma hosts a good Projection Calculator that allows you to preview how a given projector and screen size can fit inside any room/area.
https://www.optoma.com/projectioncalculator/
When used for my own project it calculated that the maximum screen size was 267 cm (105 inches). Because I want to control the maximum divergence for my viewers based on the 1:30 rule, I targetted a 238 cm (94 inches) as my target size for projection.
Projectors
The primary types of projectors for home theatres are LCD, DLP, LCoS, and Laser. Each uses a different imaging technology to create a picture, offering various strengths for image quality, brightness, and cost, with LCDs known for colour accuracy, DLPs for sharpness and motion, LCoS for high-end performance, and Lasers for long life and brightness. You'll also encounter projectors categorized by their light source, such as LED projectors, and by their placement or throw distance, like short-throw projectors.
| Type | Description |
|---|---|
| LCD (Liquid Crystal Display) | LCD (Liquid Crystal Display) is a display technology that uses liquid crystals as optical elements. In an LCD projector, the light source passes through colour filters and then enters the liquid crystal panel. The liquid crystal panel controls the amount of light passing through, which is then projected through a lens to form an image. Advantages: colour Accuracy, Affordability, Reliability Disadvantages: Contrast Ratio, Screen Door Effect |
| DLP (Digital Light Processing) | DLP (Digital Light Processing) is a display technology that uses digital micromirrors as optical elements. In a DLP projector, the light source passes through a spinning mirror, dividing the light into the three primary colours: red, green, and blue. The digital micromirrors then control the projection of these colours, which are subsequently projected through a lens to form an image. Advantages: High Contrast, Smooth Motion, Compact Design Disadvantages: Rainbow Effect |
| LED (Light Emitting Diode) | LED projectors use LED lights to produce the image. These LEDs can be red, green, and blue, which are combined to create the full spectrum of colours needed for the projected image. The light from the LEDs passes through the projection technology (either LCD panels or a DLP chip) to create the image, which is then projected onto the screen. Advantages: Longevity, Energy Efficiency, Consistent colour Disadvantages: Brightness, Cost |
| LCoS (Liquid Crystal on Silicon) | Combine features of both LCD and DLP to deliver high-resolution images, deep blacks, and accurate colours. LCoS projectors are typically found in high-end home theatres and professional installations but come at a higher price point. Advantages: Image Quality, High Resolution, No Visible Pixels Disadvantages: Cost, Size |
| Laser | Use a laser light source instead of a traditional lamp, offering a long lifespan, extremely high brightness, and true blacks. Laser projectors are ideal for large rooms and for viewing HDR content. Advantages: Brightness, colour Accuracy, Long Lifespan Disadvantages: Cost, Complexity |
Not all inputs are equal
If you use a single projector system you will be restricted to a maximum input resolution of 1080P over HDMI (the 3D Blu-ray standard). The image can be resized to the maximum resolution of the projector but it will be extrapolated version based on the 1080P input resolution constraint.
Using StereoPhoto Maker and StereoSlide Show with twin 4K projectors
StereoPhoto Maker and StereoSlide Show, both being software applications developed by the Japanese stereo photographer Masuji Suto, are can be configured to output separate 4K left and right images in Full Screen mode to a twin 4K Polarized 3D Projection System from a host computer/laptop that has additional (separate) display outputs that support 4K@60Hz in addition to the primary display. Each projector is connected to the host computer/laptop additional display outputs using a suitable HDMI cable. On a computer/laptop running the Windows OS pressing Ctrl+P when each projector is first connected will allow you to set how the desktop is configured to use the projector (duplicated or extended). Choose extended to configure each each projector as a separate 4K monitor in StereoPhoto Maker and StereoSlide Show.
Potential 3D Projection Options
(single projector, colour anaglyph glasses, white screen)
Colour Separation 3D Viewing System
You can use colour anaglyph glasses to view digital stereoscopic photographs on any device that has a colour screen such as a smartphone, computer monitor or television. The stereoscopic 3D effect is achieved by means of encoding each eye's photograph using filters of different (usually chromatically opposite) colours, typically red and cyan. When viewed through the "colour-coded" "anaglyph glasses", each of the two photographs reaches the eye it's intended for, revealing an integrated stereoscopic photograph. Anaglyph photographs are much easier to view than either parallel (diverging) or crossed-view pairs stereograms. However, these side-by-side types offer bright and accurate colour rendering, not easily achieved with anaglyphs.
| Components |
|---|
| White Projector Screen |
| Colour anaglyph 3D glasses |
| 4K Projector with HDMI 2.1 Port |
| USB-C to HDMI 2.1 cable |
| Laptop/Computer with one additional USB-C Display Enabled Port capable of supporting 4K@60Hz |
| Stereo PhotoMaker 2.31 or higher (single additional monitor selection for full screen mode) |
(single dlp projector, passive stereoscopic modulator, polarising glasses, silver screen)
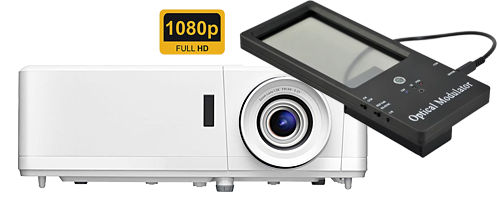
You can use active shutter 3D glasses combined with a Digital Light Processing (DLP) capable projector to view digital stereoscopic photographs on a fixed or portable screen. Projectors using the DLP technology, project alternating left and right eye images onto the screen. To create the 3D effect, the glasses must switch between blocking and allowing light to reach each eye, mirroring the projected images. To achieve synchronization, DLP Link uses a brief white flash of light between the left and right eye images. This flash is not intended to be visible to the viewer, but the glasses' sensors detect it and use it to determine when to switch the lenses. The "dark time" (the period between left and right eye images) is a crucial factor in DLP Link's performance, as it allows the glasses to switch lenses, minimizing crosstalk (when a small amount of the wrong eye's image leaks through). The dark time can vary between projector models. A modern 4K Laser DLP projector can be combined with a large white (preferably tensioned) screen (84" to 200" diagonal) to create an effective 3D Home Theatre Projection System.
| Components |
|---|
| 3D Silver Projector Screen with suitable Gain (2.4+) |
| Polarised 3D glasses |
| 4K Projector with HDMI 2.1 Port that supports 3D input with an output for connecting a Passive stereoscopic modulator |
| Passive stereoscopic modulator |
| USB-C to HDMI 2.1 cable |
| Laptop/Computer with one additional USB-C Display Enabled Port capable of supporting 4K@60Hz |
| Stereo PhotoMaker 2.31 or higher (single additional monitor selection for full screen mode) |
(single dlp projector, active shutter 3D glasses, white screen)
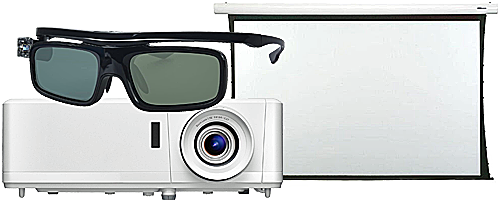
You can use active shutter 3D glasses combined with a Digital Light Processing (DLP) capable projector to view digital stereoscopic photographs on a fixed or portable screen. Projectors using the DLP technology, project alternating left and right eye images onto the screen. To create the 3D effect, the glasses must switch between blocking and allowing light to reach each eye, mirroring the projected images. To achieve synchronization, DLP Link uses a brief white flash of light between the left and right eye images. This flash is not intended to be visible to the viewer, but the glasses' sensors detect it and use it to determine when to switch the lenses. The "dark time" (the period between left and right eye images) is a crucial factor in DLP Link's performance, as it allows the glasses to switch lenses, minimizing crosstalk (when a small amount of the wrong eye's image leaks through). The dark time can vary between projector models. A modern 4K Laser DLP projector can be combined with a large white (preferably tensioned) screen (84" to 200" diagonal) to create an effective 3D Home Theatre Projection System.
| Components |
|---|
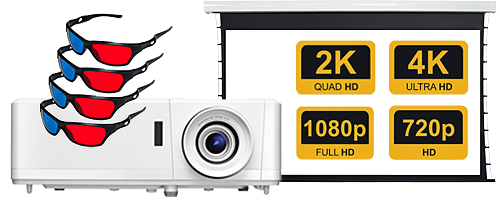
| White Projector Screen |
| Active Shutter 3D glasses |
| DLP Projector with HDMI 2.1 Port |
| USB-C to HDMI 2.1 cable |
| Laptop/Computer with one additional USB-C Display Enabled Port |
| Stereo PhotoMaker 2.31 or higher (single additional monitor selection for full screen mode) |
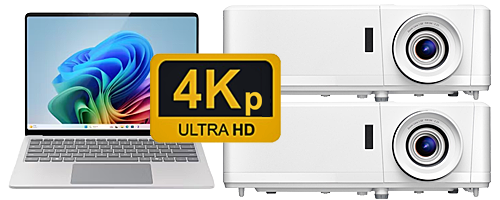
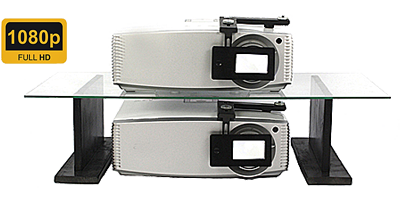
(twin 4K projectors, polarising filters, polarising glasses, silver screen)
The successful creation of a native 4K Polarized 3D Projection System to view real digital stereoscopic photographs from Stereo PhotoMaker to the big screen requires the careful selection of multiple components so that they all interoperate correctly. In version 2.31 onward of Stereo PhotoMaker you can choose to display the full screen output on one of more monitors. Historically not all computers and laptops supported more than two displays and a third party device such as a Matrox Graphics eXpansion module (Matrox DualHead2Go Series) which presented two monitors/projectors as a single extended wide screen monitor/projector to the computer/laptop. Images sent to this combined display were divided in half by the Matrox Graphics eXpansion module with the left half going to the left monitor/projector and the right half going to the right monitor/projector. The Matrox devices are no longer available as computers and laptops made them obsolete as the included native support for multiple monitors.
| Components |
|---|
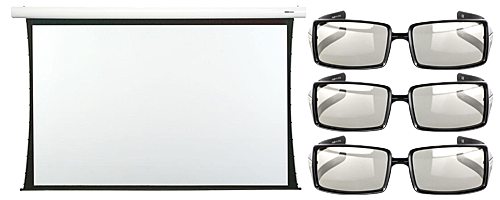
| 3D Silver Projector Screen with suitable Gain (2.4+) |
| Polarised 3D glasses |
| 2 4K Laser Projectors with HDMI 2.1 Ports |
| Separate Left and Right Glass/Acrylic Circular/Linear Polarising filters |
| Projectors and Filter mounting rig with vertical and horizontal adjustment controls |
| 2 USB-C to HDMI 2.1 cables |
| Laptop/Computer with two additional USB-C Display Enabled Ports capable of supporting 4K@60Hz |
| Stereo PhotoMaker 2.31 or higher (single additional monitor selection for full screen mode) |
| Suitable 4K Test Images for calibration/alignment/setup |
(twin projectors, infitec primor 3D system, infitec glasses, white screen)
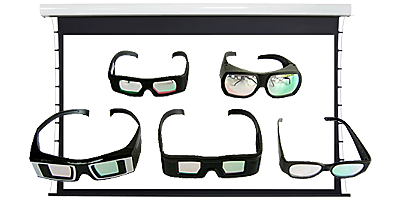
INFITEC® is a passive 3D technology for large-screen projections. The high-quality wavelength multiplex technology creates a perfect illusion of 3D depth while fully preserving the colour impression. With outstanding channel separation. INFITEC® is also compatible with any projection surface. And can therefore be seen everywhere in all its glory. Nationally and internationally.
Primor 3D Projector Development Kit - DLP, LCD - HDMI - H.264, H.265 - 1920 x 1080 - Infitec Excellence
High-Resolution Display - Offers stunning 1920 x 1080 resolution for crisp, detailed visuals, perfect for both professional presentations and immersive project display experiences.
Versatile Connectivity - Supports HDMI and advanced video codecs like H.264 and H.265, ensuring compatibility with a wide range of devices and media formats for seamless multimedia integration.
Innovative Design - Combines DLP and LCD technologies, providing enhanced colour accuracy and brightness, making it an ideal choice for developers seeking excellence in visual output.
| Components |
|---|
| White Projector Screen |
| Infitec 3D glasses |
| 2 4K Laser Projectors with HDMI 2.1 Ports |
| infitec primor 3D system |
| Projectors and Filter mounting rig with vertical and horizontal adjustment controls |
| 2 USB-C to HDMI 2.1 cables |
| Laptop/Computer with two additional USB-C Display Enabled Ports capable of supporting FHD@60Hz |
| Stereo PhotoMaker 2.31 or higher (single additional monitor selection for full screen mode) |
| Suitable FHD Test Images for calibration/alignment/setup |
...
Jeff Ewen 3D - creating real digital stereoscopic photographs.
Contact me by clicking here.